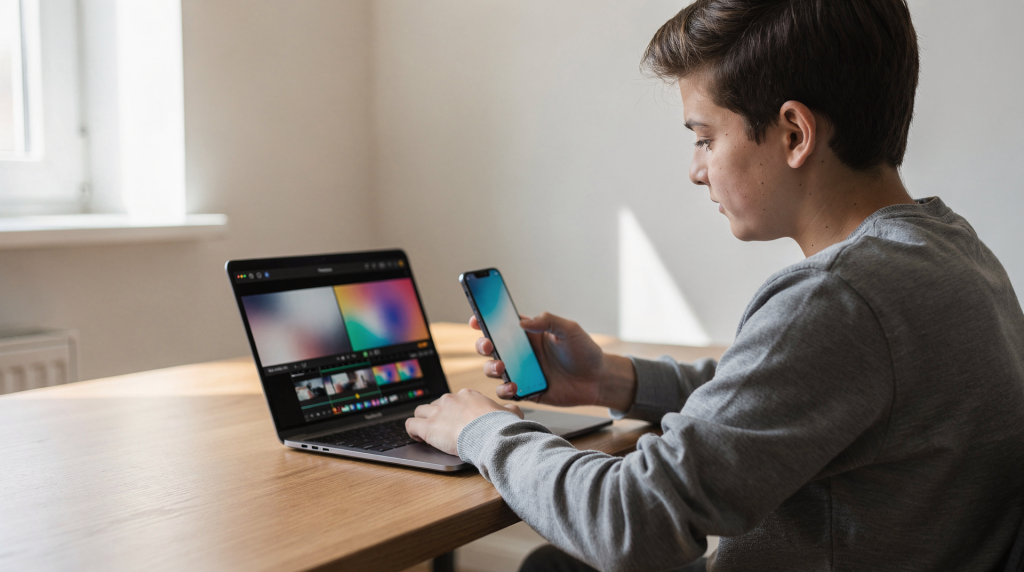
Picking your first video editing app isn’t about chasing the “best” software on a comparison chart. It’s about finding the one you’ll actually open, use, and finish a video in. When you’re cutting listing walkthroughs, social teasers, or quick property highlights, the right tool feels almost invisible — it lets you turn raw footage into something polished without wrestling the interface for hours. Most agents and new videographers I talk to don’t need 300 features. They need speed, clarity, and exports that match where their audience actually watches.
What beginners should look for in a video editing app
A solid starter editor reduces decision fatigue instead of adding to it. You want to think about pacing, shot order, and how the light moves through the kitchen — not about which submenu hides the trim tool. Practically, that means a simple timeline, forgiving trimming and splitting, decent text overlays for property labels, and export presets that get your video onto Instagram Reels, YouTube, or an MLS listing page without a detour through five format converters.
Core features that matter most
- Drag-and-drop timeline editing
- Easy trimming, splitting, and rearranging clips
- Text overlays and subtitles
- Basic color correction
- Music and sound controls
- Vertical and horizontal export presets
- Templates or guided workflows
- No steep learning curve
For real estate video specifically, there are a few extras that matter more than you’d think. Clean title cards let you label the primary suite or outdoor living space without confusion. Simple, understated transitions keep a walkthrough moving at a steady rhythm — nothing that screams “the editor just discovered the star wipe.” And the whole experience should reward consistency: if you’re publishing three listing clips a week, the app should make Monday morning feel routine, not chaotic. A flashy tool with cinematic LUTs and motion graphics won’t help if it slows you down to the point where you skip editing altogether.
Best video editing apps for beginners in 2026
Here’s a practical breakdown of the most beginner-friendly options, based on ease of use, platform, and typical use case. I’ve tested all of these across real-world listing footage — walkthroughs, drone clips stitched with interiors, quick vertical cuts for social — and the table below reflects what a newcomer actually experiences, not what a spec sheet promises.
| App | Best for | Platform | Why beginners like it |
|---|---|---|---|
| iMovie | Apple users who want a simple start | Mac, iPhone, iPad | Extremely user-friendly, basic, and easy to learn quickly |
| CapCut | Mobile-first creators and short-form video | iOS, Android, desktop | Strong beginner option with templates and more creative tools when ready |
| Clipchamp | Windows users and browser-based editing | Web, Windows | Simple interface and a good starting point for casual editors |
| InShot | First-time mobile editors | iOS, Android | Designed to help new users finish a video with minimal confusion |
| Filmora | Beginners who want room to grow | Windows, Mac | Guided editing, templates, and an approachable desktop workflow |
| DaVinci Resolve | Beginners who want a free path to advanced editing | Windows, Mac, Linux | Free and powerful, but more complex than the others |
| Adobe Premiere Elements | Beginners who want a traditional desktop editor | Windows, Mac | Beginner-oriented and less intimidating than pro software |
| VEED | Users who prefer editing in a browser | Web | Easy to navigate and useful for quick social content |
Notice something: none of these are bad tools. The real difference comes down to whether you’re trying to edit a full four-minute property tour on a phone between showings, or sitting down at a desk with a coffee and a full timeline view. Match the tool to the scenario, not the other way around.
Best app for your situation
If you use an iPhone or Mac
Start with iMovie. It’s one of the simplest editors available and works as a strong first step if you want to learn trimming, titles, and basic sequencing without a steep learning curve. For a real estate agent filming short community tours or quick interior clips on an iPhone, iMovie often covers 90% of what you actually need. The secret is its speed: you can drag clips, drop a title card with the address, and export a clean horizontal or vertical cut in under ten minutes. No glitter, no confusion.
If you edit mostly on your phone
Start with CapCut or InShot. CapCut offers more features and templates, which is handy when you want to try trending transitions or auto-captions for Reels and Shorts. InShot keeps things simpler and is often easier for a true beginner to finish a first project in — fewer buttons, fewer decisions, faster export. I’ve watched agents pick up InShot and publish their first listing teaser within twenty minutes of shooting, which is exactly the kind of result you want from a beginner tool.
If you use Windows
Start with Clipchamp or Filmora. Clipchamp is clean, browser-friendly, and accessible for basic edits like trimming walkthrough footage and adding a logo sting at the end. Filmora goes further — it’s a guided desktop experience with templates that can make a property reveal feel intentional without much design skill. If you’re shooting an exterior-to-interior sequence and want to layer text, music, and a gentle fade, Filmora handles that with straightforward controls.
If you want a free editor with professional potential
Try DaVinci Resolve. It’s free, remarkably capable, and the same tool used in professional color grading suites. But let me be honest: it asks more from you than iMovie, Clipchamp, or InShot. The node-based color panel alone can stop a beginner cold if you’re not ready for it. I’d recommend Resolve only if you’ve made a few videos already and want a tool that can grow with you as you move from simple listing edits into more polished architectural storytelling.
If you need quick social edits for listings
Choose CapCut, InShot, or VEED. These are the fastest routes to vertical clips, captions, and short promo videos that can be posted the same day. When you’ve just shot a twilight exterior and want a 30-second teaser live before open house traffic dies down, you don’t want to boot up a heavy desktop NLE. You want to load the clips, add “Coming Soon” text over the best wide shot, set music low, and hit publish.
Which beginner video editor is best for real estate?
For real estate, the best beginner app is almost always the one that helps you post a polished listing video before the competition does. All the cinematic tools in the world don’t matter if the video stays on your hard drive. In practice, here’s where things land:
- CapCut for social clips, listing teasers, and captioned vertical videos — especially on mobile, where you can edit immediately after the shoot.
- iMovie for simple property walkthroughs on Apple devices — great for agents who shoot on iPhone and want a clean, horizontal tour without friction.
- Filmora for agents or videographers who want a desktop workflow with templates — useful when you’re building a repeatable style across multiple listings.
- Clipchamp for quick edits on Windows without much setup — ideal when you need to trim a walkthrough and export from a browser on a work laptop.
Real estate videos don’t need cinematic complexity at the beginner stage. They need clean pacing so a buyer can absorb the room layout, readable text that labels key features, stable clips that don’t distract, and a format that makes the property feel easy to understand. I’ve seen listing videos with two cuts and a music bed outperform heavily edited pieces simply because the property was presented clearly and posted quickly. Don’t overthink it. Get the fundamentals right first, and let the software fade into the background.
How to choose the right app without wasting time
I’ve watched newcomers spend weeks comparing feature lists, watching tutorials, and installing five different editors — only to end up back where they started, without a single finished video. The framework below is how I help agents and new videographers make a decision in minutes, not days. It strips the choice down to what actually affects your workflow.
Use this simple decision framework
- Pick the device you already use most.
- Decide whether you want mobile editing or desktop editing.
- Choose the simplest app that can export in the formats you need.
- Test one short video before paying for anything.
- Stick with the app long enough to learn the basics before switching.
Step five is the one people skip. They hit a small frustration, assume another app will solve it, and switch — resetting their learning curve each time. Every editor has quirks. Give yours at least a week of active use before you judge it.
Ask these questions before downloading
- Do I need mobile editing or desktop editing?
- Do I need vertical video for Reels, Shorts, or TikTok?
- Do I need captions?
- Do I want templates?
- Am I editing listings, vlogs, or general social clips?
- Do I need a free option first?
Answering these honestly narrows your options to maybe two apps. That’s where you want to be — deciding between two proven tools, not scrolling an endless app store category.
Common beginner mistakes to avoid
1. Choosing software that is too advanced
I see this constantly: a new creator downloads DaVinci Resolve or Premiere Pro because it’s “what the pros use,” then spends three afternoons learning the interface before cutting a single clip. A simpler app almost always gets better results faster. When you’re starting out, finished videos build confidence and momentum. Half-finished projects sitting in a complex timeline do the opposite. Master the basics of pacing and shot selection first; you can always upgrade your tool later.
2. Overusing effects
Transitions, filters, and motion graphics can obscure weak footage, but in the context of a property video, they usually just feel distracting. A glitchy transition between the kitchen and the living room doesn’t add energy — it pulls attention away from the space itself. Clean, direct cuts between rooms keep the focus on the listing. If you’re tempted to reach for an effect, ask yourself: does this make the property clearer? If not, leave it out.
3. Ignoring aspect ratio
A perfectly framed horizontal walkthrough looks great on YouTube but gets cropped into awkward invisibility on Instagram Stories or TikTok. Always edit for the platform first. For social teasers, that means 9:16 vertical with key areas centered. For MLS or YouTube, 16:9 horizontal works well. Make this decision before you place your first clip on the timeline, not during export when it’s too late to reframe.
4. Skipping audio cleanup
Even a beautifully shot walkthrough feels unprofessional if there’s loud HVAC hum, wind rumble from an exterior shot, or music drowning out the voiceover. I always check two things before exporting: background noise levels and music-to-voice balance. Music should sit low enough that you can comfortably hear any spoken description — a common ratio is music at roughly -18 dB to -22 dB below dialogue. Small fix, huge difference in perceived quality.
5. Exporting in the wrong format
A gorgeous edit is useless if the file is too large for MLS upload limits, too compressed and artifact-ridden for large screens, or in the wrong orientation. Know your destination’s recommended settings before you hit export. Most social platforms play nicely with H.264 encoded MP4 files at 1080p or 4K, but check specific requirements. If the app offers platform-specific presets, use them — they exist precisely to prevent this mistake.
Simple beginner workflow for a first edit
This isn’t theory. It’s the exact sequence I use when teaching agents to edit their first listing video, usually with footage they shot an hour earlier on their phone. The goal is to finish with a clean, focused video — not to learn every feature in the app.
Step-by-step
- Import your clips.
- Delete unusable shots first.
- Put the strongest opening shot at the start.
- Trim each clip to remove pauses and shaky moments.
- Add simple titles or property labels.
- Insert music at a low, supportive volume.
- Review for pacing and clarity.
- Export in the correct aspect ratio.
This workflow works especially well for real estate listing videos because it keeps the edit focused on the property, not the software. Step two — deleting unusable footage before you start assembling — saves enormous time. Beginners often try to salvage every clip, but shaky pans and blown-out windows don’t help a listing. Cut them first, and you’ll edit faster with less frustration. Step three matters for retention: start with the curb appeal shot or a dramatic primary suite reveal, not a hallway walk. Hook the viewer within three seconds.
Free vs paid apps: what changes?
Free apps are often more than enough for learning the basics, especially when you’re making simple videos a few times a month. The gap narrows every year — tools like CapCut’s free tier and DaVinci Resolve’s unpaid version are genuinely powerful. Paid apps typically unlock more templates, remove watermarks, offer more export flexibility, and provide a smoother path once you start producing regularly. But the upgrade is about efficiency, not necessity.
| Option | Good for | Limitation |
|---|---|---|
| Free apps | Learning and occasional editing | Fewer features, watermarks, or limited assets |
| Paid apps | Regular publishing and more polished output | Cost, subscription fatigue, or extra complexity |
If you only need a handful of edits each month — say, two listing teasers and a community tour — free tools will serve you well. If you’re editing five or more listings every week with branded intros, lower thirds, and multiple export formats, a paid app saves real time. The watermark alone on a free version can kill perceived professionalism on a listing video, so if your tool leaves a logo on every frame, that’s often the first reason to pay.
Practical recommendation by user type
- Total beginner on Apple: iMovie
- Total beginner on Android or iPhone: InShot
- Social-first creator: CapCut
- Windows user who wants simplicity: Clipchamp
- Beginner who wants to grow into editing: Filmora
- Free advanced editor: DaVinci Resolve
- Browser-based quick edits: VEED
These recommendations prioritize the path of least resistance. A total Apple beginner doesn’t need to learn something cross-platform — they need the app already on their device, ready to go. A social-first creator benefits from CapCut’s template ecosystem because it aligns with the fast turnaround and vertical formats that Instagram and TikTok reward. Match the tool to your actual daily habits, not an aspirational version of yourself who edits like a colorist.
Checklist: before you commit to an app
- Can I learn the basics in one sitting?
- Does it run on the device I already use?
- Can I export vertical video?
- Can I add text and captions easily?
- Does it support the type of content I make most?
- Can I make one complete video without frustration?
If the answer to any of these is “no,” move on. There are too many good beginner editors in 2026 to settle for one that fights you. That last question — “without frustration” — is the real litmus test. Your first edit should feel like progress, not a battle. If the app leaves you dreading the next video, it’s the wrong fit, regardless of its feature list.
FAQ
What is the easiest video editing app for beginners?
For many beginners, iMovie is the easiest on Apple devices, while InShot is one of the simplest mobile options overall. Both share a common strength: you can figure out the core workflow in under an hour, which is exactly what you want when there’s a listing waiting to go live.
Is CapCut good for beginners?
Yes. CapCut is beginner-friendly, especially for short-form video, but it offers more tools than some first-time editors need. The template library can accelerate your workflow dramatically — you can drop clips into a pre-built structure and publish in minutes. Just be aware that the sheer number of options can overwhelm if you try to learn everything at once. Start with a template, then explore manual controls gradually.
What is the best free video editing app for beginners?
DaVinci Resolve is the most powerful free desktop option, but it is not the simplest. For pure ease of use, iMovie or Clipchamp may feel more approachable depending on your device. If you’re editing on an iPad, iMovie fits naturally; on a Windows laptop, Clipchamp gets you to an export faster with less setup. Power is great, but a tool you actually complete videos in is better.
What app should real estate agents use to edit listing videos?
For simple listing videos, CapCut, iMovie, Filmora, or Clipchamp are strong beginner choices depending on the device and platform. The deciding factor is usually whether you’re editing on a phone between showings (CapCut or iMovie mobile) or at a desk after the shoot (Filmora or Clipchamp). Either way, prioritize speed and clear presentation over elaborate editing.
Should beginners start on mobile or desktop?
Start where you are most likely to finish. Mobile is faster and easier for short social edits — you can film, edit, and publish a 30-second teaser before leaving the property. Desktop gives more control for longer walkthroughs, precise trimming, and cleaner organization across multiple takes. If you’re primarily creating Reels and Shorts, mobile will feel natural. If you’re delivering full listing tours to clients, desktop makes the process more comfortable.
Final take
The best video editing app for beginners is the one that gets you from raw footage to finished video with the least friction. A finished video today teaches you more than a theoretically perfect edit that never gets exported. If you want the fastest start, choose a simple app that matches your device, learn the basics — trimming, text, music, and export settings — and focus on clean, clear edits before you chase anything advanced.
For most beginners, that means starting with iMovie, CapCut, InShot, Clipchamp, or Filmora depending on your workflow and platform. Pick one, make a short video with it today — even just a 30-second clip of a single room — and build from there. The tool matters less than the momentum.