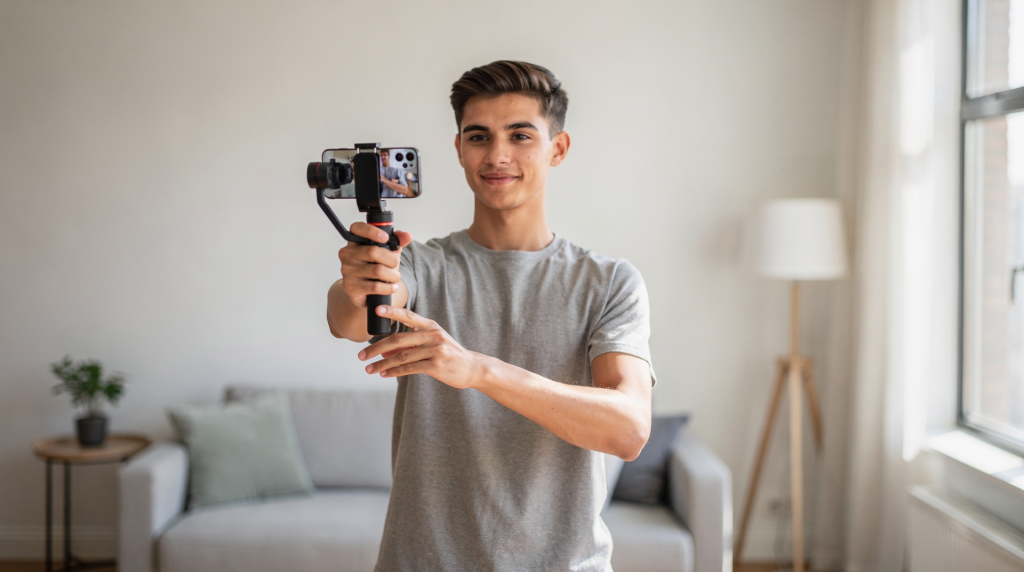
A smartphone can produce genuinely professional video when the basics are handled well: stable framing, clean audio, good light, and intentional editing. The biggest difference between “phone footage” and “professional video” is usually not the camera itself, but the way the shot is planned, captured, and finished. When I walk onto a property with just my phone, no one questions the results — because the process is deliberate, not casual.
Why a smartphone is enough for serious video work
Modern phones can shoot in 1080p or 4K, and many support 30 fps or 60 fps recording, which is more than enough for social content, business videos, walkthroughs, and short-form marketing clips. What matters most is using the phone deliberately instead of treating it like an emergency camera. I’ve delivered full listing campaigns shot entirely on my phone that agents assumed came from a mirrorless rig — not because the phone is magic, but because I controlled every variable I could.
For real estate, local business marketing, or social media promos, a smartphone is especially useful because it is fast to set up, easy to move with, and less intimidating for clients or talent. That makes it a strong tool for quick listing teasers, property walkthroughs, agent intros, before-and-after clips, and behind-the-scenes content. When a seller is anxious about cameras in their home, pulling out a familiar phone instead of a full gimbal setup changes the entire energy in the room — and often gets you better, more natural footage.
What makes smartphone video look professional
Professional-looking smartphone video usually comes down to five things:
- stable shots
- controlled light
- clean audio
- consistent framing
- careful editing
If one of these is weak, the video feels amateur even if the image quality is technically sharp. If all five are solid, a phone video can look polished enough for ads, websites, and social campaigns. I’ve seen 4K footage that looked unwatchable because the frame bounced with every step, and 1080p clips that felt cinematic because the tripod and light were dialed in. The phone itself is rarely the bottleneck — the approach almost always is.
Before you record: set up like a pro
1) Clean the lens
A smudged lens is one of the fastest ways to ruin an otherwise good shot. Wipe the camera lens before every shoot so the image stays crisp and contrasty. On property shoots, you’re constantly touching your phone to check shot lists, adjust settings, or reply to an agent — fingerprints accumulate fast. Make lens-cleaning a reflex, not an afterthought.
2) Choose the right orientation
Use landscape for YouTube, websites, and most real estate videos. The wide frame lets you show the relationship between rooms and captures the spatial flow buyers care about. Use portrait when the final output is designed for social platforms like Reels, Shorts, or TikTok. Portrait walkthroughs with quick cuts and captions can dramatically outperform landscape versions on mobile feeds — but you must commit to the orientation before you start shooting, because reframing in post almost always costs you composition quality.
3) Set the resolution and frame rate
A safe default is 1080p at 30 fps for most online content. That combination gives you manageable file sizes, clean motion, and plenty of quality for listing sites and social platforms. Use 4K if you want more room to crop during editing or if the footage needs to hold up on larger screens — I often shoot 4K for kitchen detail shots or exterior drone-style establishing clips (even if the drone is just my phone on a pole) because the extra resolution lets me stabilize further or pull a tight crop without losing sharpness. Use 60 fps when you want smoother motion or need slow-motion options in post. A slow-motion pan across a pool area or a reveal through sliding glass doors at 60 fps converted to 30 looks far more intentional than trying to creep the phone slowly in real time.
4) Turn on airplane mode
Notifications and calls can interrupt a shoot at the worst moment. Put the phone in airplane mode and silence everything else before you hit record. I’ve lost a perfect walkthrough take to a calendar alert popping up mid-pan — now airplane mode is as automatic as locking exposure.
5) Check storage and battery
Nothing kills momentum like a full memory or dead battery. Charge fully before filming and make sure there is enough storage for longer clips. For a typical property shoot with walkthroughs, detail shots, and a few social teasers, I want at least 20GB free. Running out of space halfway through a master suite is not the kind of problem you want to solve while the seller waits in the living room.
How to shoot stable footage with a smartphone
Shaky footage is one of the clearest signs that a video was rushed. Stability matters even more on phones because small movements are easy to notice. In real estate video, instability makes rooms feel smaller and distracts from the spatial experience buyers need.
Use both hands and keep the phone close
Hold the phone with both hands and bring your elbows in toward your body to reduce movement. This simple habit is often enough to improve handheld shots immediately. When I walk through narrow hallways or tight bathrooms, I tuck my elbows against my ribs and take short, deliberate steps — almost gliding — which smooths out the micro-bounces that phone stabilisation can’t fully correct.
Use a tripod whenever possible
A tripod is the easiest way to make phone video look intentional and balanced. It is especially useful for interviews, property overviews, product shots, and any scene where you want a clean, steady frame. For exterior establishing shots or living room wide angles, I use a compact phone tripod with a fluid head — the slow, even pan across a room tells a buyer’s eye that this is a considered presentation, not a quick iPhone flick.
Move slowly if you need motion
If the shot needs movement, move as slowly as possible. Fast pans and sudden steps make smartphone footage feel amateur. Slow, deliberate motion looks far more controlled. A good rule for property walkthroughs: move at half the speed that feels natural, then slow down again. The resulting footage will have a weight and smoothness that separates it from casual phone clips.
Avoid digital zoom
Zooming digitally often makes image quality worse and magnifies shake. It is usually better to step closer or reframe physically. When I want a tighter shot of a fireplace mantel or a backsplash detail, I move the phone closer rather than pinching the screen — at 2x digital zoom on most phones, you’ve already traded noticeable sharpness for convenience.
Light: the difference between average and polished video
Good light does more for smartphone video than almost any setting. A phone can handle a lot, but it still looks best when the subject is well lit and the exposure is balanced. In property work, light is the invisible tool that makes a room look spacious and welcoming — or cramped and uninviting.
Use natural light when possible
Natural light is often the easiest and most flattering option. Place the subject near a window or film in a bright, even environment without harsh contrast. For interior walkthroughs, I schedule shoots during mid-morning or late afternoon when window light is soft and directional, not the harsh overhead blast of noon sun that creates deep shadows under cabinets and furniture.
Keep bright light behind the camera, not behind the subject
A bright light source behind the subject can create silhouettes and confuse the camera’s exposure. In practical terms, put the main light in front of the subject whenever you can. When filming an agent intro in a living room, I position them facing the main window with the phone between them and the light source — this gives even skin tones, catchlights in the eyes, and no blown-out backgrounds.
Avoid harsh midday sun
Direct sun creates strong shadows and blown highlights. If you are filming outdoors, shade is often better than direct sun. For exterior property shots, overcast days are a gift — the soft, diffused light shows paint colours accurately and avoids the stark contrast that makes landscaping look patchy. Bright midday sun can also overheat phones during long exterior shoots, causing the screen to dim and the camera to throttle performance.
Lock exposure when the scene is steady
Phones can “hunt” for exposure while filming. If your device allows it, tap to set focus and exposure, then lock them so brightness does not shift during the shot. I lock exposure on the neutral midtones of a room — say, a wall or a sofa — so that as I pan across windows or dark corners, the phone doesn’t suddenly overbrighten or crush the shadows. This alone makes footage look far more professional because the eye isn’t distracted by shifting brightness.
Audio matters more than most people think
Viewers forgive slightly imperfect visuals more easily than bad audio. Muffled speech, wind noise, and room echo make even a sharp video feel low quality. In empty properties, audio can be especially tricky because hard surfaces bounce sound everywhere.
Record in quiet places
Choose the quietest location available and get the phone as close to the speaker as practical. For agent voiceovers in a property, I often record in a carpeted bedroom with the door closed — carpets, curtains, and bedding absorb reflections that would make a bare kitchen or tiled bathroom sound echoey and hollow.
Use an external microphone if the audio is important
If the video includes an interview, voiceover, or clear talking head delivery, an external mic is worth it. A small lavalier or wireless mic usually improves clarity far more than upgrading the phone itself. I carry a compact wireless lavalier kit that connects to the phone’s charging port — for agent clips or listing narration, it delivers close, clean speech that cuts through room tone and makes the final mix sound broadcast-ready.
Watch for background noise
Air conditioning, traffic, fans, and echo are all common problems. Test the room before recording the final take. On property shoots, I ask the seller or agent to turn off HVAC systems and fountains during audio takes — five seconds of quiet control saves an hour of noise reduction in post.
Composition: make the frame look intentional
A professional video does not just capture the subject; it presents it clearly. Composition is where you decide what the viewer sees and in what order — in real estate, that’s the sequence of discovery that leads a buyer through the property.
Keep the background clean
Look behind the subject before recording. Distracting objects, clutter, and crooked lines pull attention away from the message. Before I shoot any room, I do a quick scan of the background: straighten picture frames on the wall, remove stray cables, close toilet lids, and clear countertops. These tiny resets take seconds but make the frame feel instantly more premium.
Use eye-level framing when appropriate
Eye-level shots usually feel natural and trustworthy. For real estate, this is often the best base angle for walkthroughs and agent clips. Shooting from chest or eye height gives the viewer a sense of being present in the space. Low angles can make ceilings feel taller but distort proportions; high angles shrink rooms. Eye-level is honest and spatial — buyers trust it.
Leave breathing room
Do not press the subject tightly against the edge of the frame. Leave enough space so the image feels balanced. In property detail shots — like a unique light fixture or a fireplace mantel — I leave a margin around the feature so the eye can settle on it without feeling cramped.
Use simple visual structure
The frame should answer three questions quickly:
- What is the subject?
- Where is it happening?
- Why should the viewer care?
For a real estate walkthrough, the subject might be the open-plan living area, the place is the property itself, and the reason to care is the natural light, the layout flow, or a standout feature like a chef’s kitchen. If the frame doesn’t clearly answer those three things within the first second, I recompose.
A simple shooting workflow that saves time
Step 1: Define the goal
Decide what the video needs to do before you shoot. Is it meant to inform, sell, showcase, or entertain? A listing walkthrough sells the space, an agent intro builds trust, a social teaser generates curiosity. The goal shapes lens choice, movement style, and pace — so clarity upfront prevents a pile of unfocused footage later.
Step 2: Write a short shot list
List every shot you need before filming. A basic shot list might include:
- opening wide shot
- main subject close-up
- supporting detail shots
- movement shot
- closing shot or call to action
For a property, I break it room by room: an establishing wide for each space, two detail shots (flooring, fixtures, views), and a slow pull-back or reveal to close the tour. This list keeps me efficient and ensures I don’t get home and realise I missed the butler’s pantry.
Step 3: Scout the location
Check the space in advance if possible. Look for noise, light direction, clutter, and reflections. Even a five-minute walk-through before the shoot lets me identify problem areas — like a mirror wall that will catch the phone’s reflection or a room that needs supplemental light — and solve them before the camera rolls.
Step 4: Film the main takes first
Capture the core message while the setup is still clean and the subject is fresh. For property work, that means shooting the key room walkthroughs and the agent segments early, when energy is high and before the light shifts.
Step 5: Get supporting footage
Shoot extra clips for editing flexibility. This is especially useful for property videos, product demos, and social content. I always grab additional detail shots, reverse angles, and empty frames that can serve as cutaways or transition points in the edit — these small extras often make the difference between a stiff sequence and a fluid, watchable video.
Editing on a phone: keep it clean and fast
Start with the best takes
Watch all footage first, then build a rough cut from the strongest clips. Remove pauses, mistakes, and anything that does not move the story forward. I mark the best takes directly in my phone’s gallery immediately after the shoot — it accelerates the edit because I’m not hunting through twenty similar pans of the same hallway.
Trim aggressively
Shorter is often better. If a clip does not add value, cut it. A listing walkthrough that runs ninety seconds instead of three minutes will hold attention far better on social feeds, and the agent gets a leaner asset that buyers actually finish watching.
Add text only when it helps
Use titles, captions, and labels to clarify important points, not to decorate every frame. For social teasers, I add short text overlays that highlight key features — “Chef’s kitchen,” “Walk-in closet,” “Private patio” — but I keep them minimal and fast to read, because viewers on Reels and TikTok scroll at lightning speed.
Keep transitions simple
Overly flashy transitions can make a clean video feel cheap. Straight cuts usually work best for business and real estate content. A simple dissolve or a quick white flash is occasionally useful for a montage, but most property videos benefit from clean, direct cuts that respect the viewer’s time and the space’s elegance.
Organize clips before editing
Separate footage by scene, location, or purpose so the timeline stays manageable. For a full property shoot, I create folders for Exterior, Living, Kitchen, Bedrooms, Bathrooms, Details, and Agent Clips — pulling a structured timeline together from these is far faster than sifting through a single camera roll.
Smartphone video settings: quick reference
| Setting | Recommended use | Why it helps |
|---|---|---|
| 1080p | Most social and business videos | Efficient and good quality |
| 4K | Higher-end projects or cropping flexibility | More detail in post |
| 30 fps | Standard online video | Smooth and storage-friendly |
| 60 fps | Smoother motion or slow motion | Useful for movement-heavy shots |
| Landscape | Websites, YouTube, real estate walkthroughs | Best for wide viewing |
| Portrait | Reels, Shorts, TikTok | Fits mobile-first platforms |
Common mistakes to avoid
- filming with a dirty lens
- using digital zoom instead of moving closer
- recording in mixed or poor light
- letting the background distract from the subject
- ignoring audio quality
- shooting without a plan
- overediting with too many effects
- moving the camera too quickly
- forgetting to check battery and storage
I’d add one more that catches even experienced shooters: failing to check for vertical lines. In real estate, slight phone tilt makes walls look like they’re falling inward or outward — it’s disorienting. Use the grid overlay on your phone and keep verticals vertical, especially in doorways and corners.
Best practices for real estate and property videos
Smartphones are especially effective for real estate because they are fast and versatile. For listing content, use the phone to create:
- exterior establishing shots
- room-to-room walkthroughs
- detail shots of finishes and features
- vertical social teasers
- short agent voiceover clips
For property work, stability and light are the two biggest priorities. Use a tripod for static shots, move slowly through rooms, and avoid wide angle distortion that makes spaces look unrealistic. Honest framing is better than aggressive lens tricks — the ultrawide lens on most phones can dramatically stretch a room, but buyers often feel deceived when they walk through and the proportions don’t match the video. I stick to the main wide lens (usually around 24–28mm equivalent) for most rooms and only use the ultrawide for tight spaces like bathrooms where a true representation of scale matters less than showing the full layout.
When shooting walkthroughs, I open doors and walk through them in one continuous motion — this gives the edit a natural flow and shows the relationship between spaces. For detail shots, I get the phone close enough to show texture: wood grain on floors, the veining in stone countertops, the finish on cabinet hardware. These small touches help a property video feel thorough and considered, not just a quick phone tour.
Practical checklist before every shoot
- clean the lens
- charge the phone fully
- free up storage
- turn on airplane mode
- choose landscape or portrait before recording
- confirm resolution and frame rate
- test audio
- check the background
- lock exposure and focus if available
- record a short test clip
- review the test before shooting the full video
I also add: walk the property with the phone in hand to preview how natural light hits each room at that time of day, and confirm that all lights and lamps inside the property are turned on — mixed window light and artificial light can create colour temperature issues, but a quick white-balance lock or simply matching all bulbs to the same temperature (warm or daylight) avoids sickly yellow or cold blue tints in the final footage.
Conclusion
A smartphone can absolutely produce professional video if you treat it like a real production tool. Stable shots, good light, clear audio, and a simple editing workflow matter far more than owning the latest camera.
For real estate professionals and videographers, that means the phone is not a compromise — it is a fast, practical way to create polished content that looks clean, useful, and credible when the basics are done right. The agents I work with don’t ask what camera I used; they ask how soon they can post the video. That’s the real metric — and a smartphone in skilled hands hits it every time.
FAQ
Can a smartphone really replace a camera for professional video?
Yes, for many business, social, and real estate applications, a smartphone is enough when the footage is planned and shot well. In property work specifically, the difference between a phone video that sells a listing and one that doesn’t is rarely the sensor — it’s the stability, light control, and editing rhythm.
What is the best resolution for smartphone video?
1080p is the safest default for most content, while 4K is useful when you want extra detail or editing flexibility. For listing sites that compress heavily, 1080p often looks cleaner after upload than a poorly compressed 4K file. I shoot 4K when I know I’ll crop or stabilize in post, and 1080p for quick-turnaround social cuts.
Should I shoot in 30 fps or 60 fps?
Use 30 fps for standard video and 60 fps when you want smoother motion or the option to slow footage down later. For most property walkthroughs, 30 fps gives a natural, cinematic cadence. For dynamic exterior shots, pool pans, or social teasers where slow motion adds drama, 60 fps gives the flexibility to conform to 30 in post for buttery slow sequences.
Do I need extra gear?
Not always. A tripod and an external microphone give the biggest improvement for the lowest effort. For real estate specifically, a small phone tripod with a fluid head and a pocket-sized LED panel for filling shadows can transform interior shots without adding significant setup time or intimidating the homeowner.
What is the fastest way to make phone video look better?
Improve light, stabilize the shot, and clean up audio. Those three changes usually produce the biggest jump in quality. In practical terms, for your next property shoot: lock the phone on a tripod, position the subject near a window, and clip on a lavalier mic — the raw footage will immediately feel more professional than anything shot handheld in auto mode.