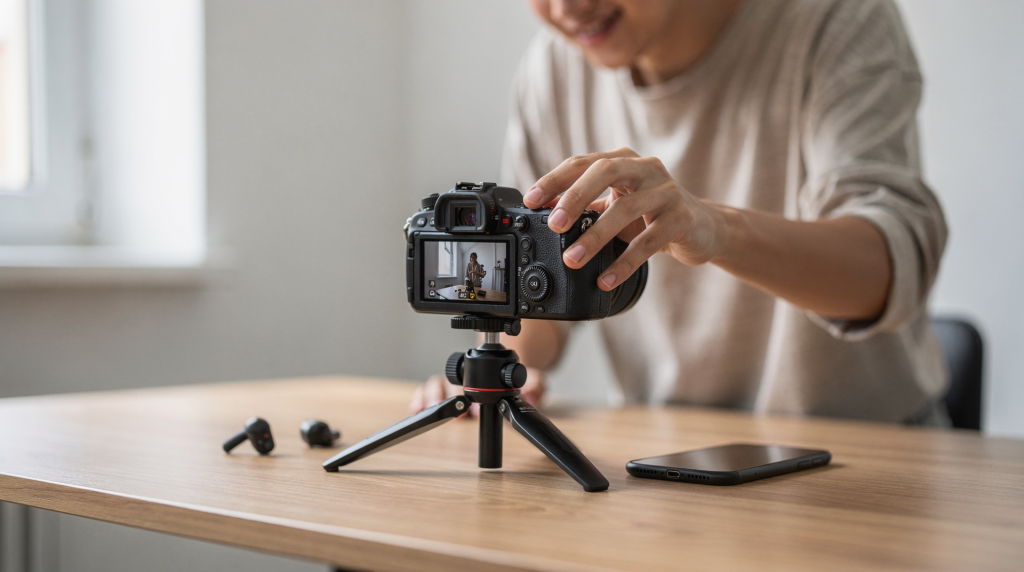
When you’re producing listing teasers, agent walkthroughs, or quick social cuts of a property, the last thing you want is to waste a shoot day fighting unpredictable auto settings. I’ve walked into enough sun-drenched living rooms and dimly lit basements to know that a clean, consistent image starts with three deliberate choices: frame rate, shutter speed, and white balance. Nail those, then dial in ISO, focus, and resolution so your footage looks cohesive from room to room and edits together without headaches.
Why camera settings matter for social media video
Platforms like Instagram, TikTok, and YouTube Shorts compress video aggressively and serve it on small screens. Any technical instability — color shifts between rooms, harsh stuttery motion on a slider shot, grainy shadows in a poorly lit hallway — becomes instantly distracting. Your settings directly control motion blur, brightness consistency, color fidelity, and sharpness, which means you’re building a foundation that holds up through compression and keeps a listing looking polished, not sloppy.
A beginner doesn’t need to master every menu option. You need a reliable baseline that works whether you’re filming a quick agent intro, b-roll of kitchen details, vertical reels for a new listing, or short-form social cuts that show a property’s flow.
The best starter settings for most social videos
Here’s the simplest starting point I give anyone walking onto their first property shoot.
| Setting | Good starting point | Why it works |
|---|---|---|
| Frame rate | 30 fps | Smooth, clean motion that handles handheld walkthroughs and quick pans without feeling jarring |
| Shutter speed | 1/60 | Pairs naturally with 30 fps to deliver realistic motion blur that mimics how our eyes perceive movement |
| ISO | As low as possible | Minimizes noise and grain, which is especially important in shadowy corners of a room or darker interiors |
| White balance | Manual or locked preset | Keeps color consistent from room to room, so the warm kitchen doesn’t suddenly look neutral and the cool living room doesn’t shift unexpectedly |
| Focus | Continuous eye/face AF or manual focus | Keeps the subject sharp — whether it’s an agent speaking or a static detail shot of countertop texture |
| Resolution | 1080p or 4K | Gives flexibility for cropping, stabilizing, and reframing; 4K is especially useful if your camera and storage can handle it, letting you punch in for detail shots without losing quality |
Frame rate: choose this first
Frame rate determines how many still images your camera captures per second, and this decision ripples through your entire production. For property walkthroughs, agent reels, and quick social cuts, 30 fps is the default I recommend. It strikes the right balance — motion feels smooth, handheld pans across a living room don’t feel jittery, and talking-head clips look natural.
24 fps can work if you’re deliberately chasing a more filmic, slower-paced aesthetic — think a stylized architectural montage — but for everyday listing videos, it’s a stylistic choice that can feel slightly too soft when someone’s scrolling quickly on their phone.
60 fps has a specific utility: slow motion or extra-smooth playback on fast-moving shots. If you’re doing a gimbal run through a hallway, showcasing quick hand gestures, or capturing b-roll where you want the option to slow footage down in post, this is your pick. But for standard talking-head or static tripod shots, 60 fps unnecessarily bloats file sizes and can make motion look unnaturally crisp.
Simple rule
- 24 fps = more film-like, deliberate pacing
- 30 fps = best everyday option for real estate content
- 60 fps = slow motion or fast movement where you want edit flexibility
Shutter speed: keep it tied to frame rate
Shutter speed governs how much motion blur each frame contains, and the classic rule — set it to roughly double your frame rate — is the quickest way to make movement feel natural. I’ve seen too many listing videos where a pan across a beautifully staged room looked choppy and mechanical, and nine times out of ten, the culprit was a shutter speed left too high after shooting stills.
Easy reference
- 24 fps → 1/50 sec
- 30 fps → 1/60 sec
- 60 fps → 1/120 sec
If your camera doesn’t offer the exact reciprocal, pick the closest value. On most DSLRs and mirrorless bodies, 1/50 is the practical choice for 24 fps, and 1/60 for 30 fps. The motion doesn’t need to be mathematically perfect — it just needs to avoid that harsh, staccato feel.
Common beginner mistake
Avoid cranking up shutter speed unless you have a deliberate reason — freezing water droplets in a fountain shot, for instance. Fast shutter settings reduce motion blur so much that walking shots, hand gestures, and smooth pans can look unnervingly sharp and jittery on playback, a problem that becomes even more pronounced after social media compression.
ISO: keep it low, raise it only when necessary
ISO controls how sensitive your camera sensor is to light. In real estate work, you’ll battle wildly varying light conditions: bright sunlit exteriors, dim dining rooms, shadowy corridors. Keeping ISO as low as possible ensures cleaner footage with less digital noise, which matters because noise gets amplified by social media compression and looks particularly ugly on phone screens.
Practical ISO approach
- Bright outdoor scenes: lock ISO at its base level — your camera’s native sensitivity where noise is minimal
- Indoor scenes with good lighting: start low and raise incrementally only if the image is underexposed despite your lighting setup
- Dark rooms: increase ISO carefully rather than delivering severely underexposed footage, but treat it as a last resort after you’ve opened up aperture or added light
Higher ISO can salvage a shot, but it introduces grain that softens details — think textured walls, fabric patterns, and fine trim work — and once that detail is lost, it doesn’t come back.
Important note
If the image is too dark, the real fix is usually more light, not more ISO. Before a shoot, I’ll walk through a property and note which rooms need supplemental lighting. A small LED panel bouncing off a ceiling, repositioning a lamp, or simply opening more blinds often improves image quality more dramatically than pushing the camera sensor harder and hoping for the best.
White balance: stop the color from changing mid-shot
White balance tells the camera what neutral white should look like under the current light, and this is where I see beginners lose color consistency shot to shot — especially in properties with mixed lighting. If you leave white balance on auto, the camera can shift mid-recording when you pan past a window or walk under different ceiling fixtures, and suddenly your warm, inviting kitchen looks sterile while the adjacent hallway turns orange.
Locking white balance manually or to a preset before recording is one of the simplest ways to make footage look intentional and professional. I set it once at the start of a room or sequence, then leave it untouched unless lighting conditions genuinely change.
Common presets
- Daylight: for bright natural light and rooms with large windows
- Tungsten/Incandescent: for warm indoor bulbs, typically found in dining rooms and bedrooms
- Fluorescent: for office-like spaces, garages, or utility rooms with cooler overhead tubes
- Auto white balance: acceptable for quick test clips, but unreliable for final takes
Best practice
Set white balance once at the start of the shoot, then leave it alone unless the lighting changes significantly. This keeps skin tones consistent when an agent walks from a sunlit foyer into a lamp-lit living room, and it prevents brand or staging colors from shifting in ways that make the video feel amateur.
Focus settings: keep the subject sharp
For social video, sharp focus is non-negotiable. A soft face or a drifting focus pull on a detail shot of cabinetry instantly breaks viewer trust and makes the production feel sloppy. This is doubly true in real estate, where you want both the agent and the property to look crisp and well-defined.
Best beginner options
- Continuous autofocus with face or eye tracking for talking-head clips and agent walk-and-talks through a home
- Manual focus for locked-off shots, flat lay product-style details of fixtures, or static tripod setups where you frame the shot and don’t want the focus to wander
- Tap-to-focus on mobile-style cameras if that’s the most reliable option available and you need a quick way to recompose focus mid-shot
If your subject stays planted — an agent standing in front of a fireplace describing the great room — manual focus is safer because there’s no risk of the camera hunting between their face and a busy background. If the subject moves through rooms, continuous autofocus with face detection is usually faster and more practical.
When autofocus causes problems
Autofocus can pulse, breathe, or snap to a passing reflection if the background is busy with furniture, mirrors, or patterned wallpaper. In those situations, switch to manual focus, set it carefully, and run a short test clip before the real take.
Resolution: 1080p or 4K?
Resolution dictates how much detail the camera records. For beginner social media video, 1080p is completely serviceable — it keeps file sizes manageable, edits smoothly on most hardware, and holds up fine for quick vertical cuts and Instagram posts. I often shoot 1080p when turnaround speed is the priority and I know the final delivery will be phone-friendly.
4K is the smarter choice when you want editing flexibility: the ability to crop into a wide room shot for closer detail, stabilize handheld footage in post without losing sharpness, or repurpose clips for multiple formats and aspect ratios without leaving resolution on the table. It also future-proofs your footage for clients who may want stills pulled or repurposed later.
Quick guidance
- 1080p: lighter files, easier editing, perfectly adequate for most social posts
- 4K: sharper image, more editing flexibility, better for long-term use
If your editing machine struggles or storage is tight, 1080p is not a compromise — clean exposure and reliable focus matter far more than raw pixel count. A well-lit, sharply focused 1080p clip will always outperform a noisy, shaky 4K one.
Best settings by content type
Different social video formats call for slightly different starting points. Use this table as a practical reference before you walk into a shoot.
| Content type | Frame rate | Shutter speed | Notes |
|---|---|---|---|
| Talking head / Reels / Shorts | 30 fps | 1/60 | Best all-around look for agent intros, quick property highlights, and vertical formats |
| Cinematic b-roll | 24 fps | 1/50 | Softer, more film-like motion — useful for curated property montages and slower, stylized sequences |
| Fast action or slow motion | 60 fps | 1/120 | Ideal for gimbal runs through a home, fast pans, or b-roll where you want the option to slow footage in the edit |
| Product demo | 30 fps | 1/60 | Clean, clear, easy to edit — works well for showing appliances, fixtures, or design features |
| Indoor office content | 30 fps | 1/60 | Pair with locked white balance and controlled lighting for consistent results across different rooms |
How to set up your camera step by step
1. Pick the frame rate
Choose 30 fps for most social content. Use 24 fps only if you want a more cinematic feel, and 60 fps if you plan to slow footage down later or need ultra-smooth motion on moving camera shots.
2. Set shutter speed
Match shutter speed to about double the frame rate. This is the simplest way to get natural motion blur that feels right to the viewer.
3. Lock white balance
Use a preset or dial in a custom white balance based on the light in the room. Do this before recording so your colors don’t shift mid-clip when a cloud passes or you pan under a different light fixture.
4. Set ISO
Start as low as possible. Raise ISO only when the image is too dark and you can’t add more light.
5. Choose focus mode
Use face or eye tracking for people, manual focus for products or static scenes, and always test focus before you hit record.
6. Check exposure
Look at the preview and ensure highlights — like windows or white countertops — aren’t blown out, and faces aren’t buried in shadow. If the scene is too bright, control the light or use an ND filter instead of breaking your shutter-speed rule to compensate.
When to use an ND filter
An ND filter is essentially sunglasses for your lens. It reduces the amount of light hitting the sensor without altering color, and it’s invaluable outdoors when you want to maintain a normal shutter speed but the scene is overwhelmingly bright — think sun-drenched patios, pool decks, or exteriors shot in midday light.
Without an ND filter, beginners often fix overexposure by cranking up shutter speed, which kills motion blur and makes handheld pans look choppy. An ND filter lets you hold the correct motion blur while keeping exposure under control, which is why I keep a variable ND in my kit for property exteriors and bright interior spaces with floor-to-ceiling windows.
Beginner checklist before recording
- Frame rate set intentionally, not left on whatever the camera defaults to
- Shutter speed close to double the frame rate
- White balance locked or manually set
- ISO as low as practical for the lighting conditions
- Focus mode tested and stable
- Lighting checked on the subject, not just the background
- Test clip recorded and reviewed before the real take
Common mistakes beginners make
- Leaving everything on auto, which creates inconsistent footage that’s a nightmare to color-match in editing
- Using a shutter speed that’s too fast, causing unnatural, stuttery motion on pans and walkthroughs
- Letting auto white balance shift color from room to room, making the edit look disjointed
- Pushing ISO too high instead of adding light, introducing noise that softens architectural details
- Choosing 60 fps for every video, even when it’s unnecessary and bloats file sizes
- Ignoring focus until the clip is already ruined — a soft face or detail shot can’t be fixed in post
A simple starter formula
If you want the shortest possible setup rule that I’d hand to someone walking onto their first listing shoot, it’s this:
- 30 fps
- 1/60 shutter
- low ISO
- locked white balance
- face tracking or manual focus
That combination will handle a large share of social media video situations without making the setup complicated, and it gives you a consistent, professional baseline that cuts together smoothly in the edit.
FAQ
What are the best beginner camera settings for social media videos?
A strong starting point is 30 fps, 1/60 shutter speed, low ISO, locked white balance, and stable autofocus or manual focus. This baseline works for everything from listing teasers to quick property tours and agent reels.
Should I shoot social media videos in 24 fps or 30 fps?
Use 30 fps for most social content because it looks smooth and works well across all platforms. Use 24 fps if you want a more cinematic, slower feel — useful for stylized property montages but not the best all-around setting for everyday listing videos.
Is 4K necessary for social media?
No, but 4K gives more editing flexibility, lets you crop or stabilize without losing quality, and future-proofs your footage. 1080p is still perfectly fine if you want smaller files and a simpler, faster workflow.
Why does my video look choppy?
The shutter speed is often too fast, or the frame rate and shutter speed aren’t matched correctly. Start by using the double-frame-rate rule and test a short clip to confirm motion looks natural.
Why do my colors keep changing during recording?
Auto white balance is probably reacting to different light sources or changes in the scene as you move. Lock white balance manually for consistent color from shot to shot.
Final take
For beginner social media video, don’t overcomplicate the camera setup. Start with 30 fps, set the correct shutter speed, keep ISO low, lock white balance, and make sure focus is reliable. Once those basics are consistent, your footage will look cleaner, more intentional, and significantly easier to edit — whether you’re producing a quick listing teaser or building a full property tour.