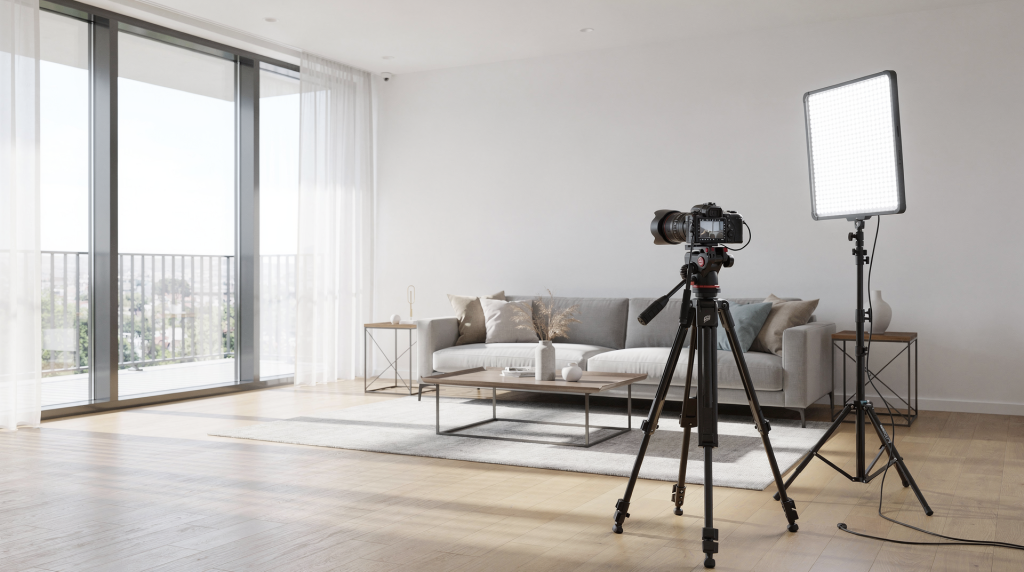
Good lighting does not shout — it whispers. In property video, you are rarely chasing dramatic effects. You are chasing trust: a room that feels open, surfaces that read as clean, windows that show just enough of the world outside without stealing the whole frame. The challenge is less about brightness and more about consistency, and the most reliable results almost always start with what the space already gives you.
Why lighting matters in property video
When a buyer scrolls through listings, they are making split-second judgments about size, condition, and value — and lighting sits behind all three.
– **Space**: a dark corner eats square footage. Even a generously sized room can feel cramped if the light dies halfway across the floor.
– **Accuracy**: if the walls look greenish on camera and creamy-white in person, you have already broken the trust you need for an in-person showing.
– **Confidence**: harsh shadows across a kitchen island or a blown-out window behind the sofa can make the entire production feel rushed.
For most real estate shoots, the sweet spot sits at the intersection of natural daylight, the home’s own interior fixtures, and a disciplined exposure strategy that stays coherent as you move from room to room. The audience — agents, buyers, listing portals — should never stop to wonder why the hallway feels like a different house than the living room.
The core rule: choose what matters most in the frame
Before you unpack a single light stand, make one deliberate choice. In this specific shot, what is the viewer supposed to value most?
– The interior volume and detail of the room
– The exterior view through the windows
– A careful balance between the two
You almost never get all three at the same time without compromise. If a property sits on a cliffside and the ocean view is the headliner, protect it — let the interior sit slightly darker if needed, or bring in soft fill to lift the foreground without competing with the glass. If the room itself is the story, let the windows glow a little bright and concentrate on keeping the walls, floors, and furniture cleanly exposed. The discipline is in picking one priority per shot and committing to it.
The best lighting approach for real estate video
1. Start with daylight whenever possible
Daylight remains the most forgiving, most believable light source for property work. It wraps around surfaces naturally, renders color accurately, and costs you nothing in setup time.
Ideal daylight conditions include:
– High, thin cloud cover that scatters light evenly across an elevation
– Morning light entering east-facing rooms — soft, cool, and directional without being harsh
– Late afternoon sun in west-facing spaces, when the warmth feels intentional
– Rooms with generous windows and no direct sun blasting across the floor
The moments to avoid are when hard sunlight cuts sharp geometric shapes across furniture or floorboards. Those patches shift quickly, which creates matching headaches when you try to cut between clips shot minutes apart. If direct sun is unavoidable, wait it out, use diffusion, or change your shooting angle.
2. Open and control window coverings intentionally
Blinds and curtains are part of your lighting rig. Treat them as such.
A practical system:
– Open coverings fully where the outdoor view adds value and the incoming light supports the room
– Angle or close them where glare on glossy floors, mirrors, or stainless steel becomes a distraction
– Make a single, conscious call per room — do not leave a row of blinds half-cranked at random heights because it reads as sloppy on camera
And before you position a single light, clean every windowpane, mirror, and reflective surface you plan to feature. A tiny smudge becomes a glaring distraction the moment a strong key light or sunlight hits it.
3. Turn on practical lights, but only if they help
Practical lights — the home’s built-in fixtures, table lamps, sconces — add dimensionality and warmth when used deliberately. But they can also sabotage a scene if you let them run on autopilot.
Turn them on when:
– A room feels flat or one-dimensional with daylight alone
– You want a lived-in, residential feel instead of a sterile showroom look
– Transitional areas like stairwells, hallways, or alcoves need a little extra presence to read clearly on camera
Exercise restraint with:
– Fluorescent tubes or cheap LED bulbs that introduce a sickly green or cool-blue spike
– Mixed warm and cool sources clashing within the same frame — an orange lamp next to a blue window looks unresolved
– Overhead ceiling fixtures that pool harsh light in the center of a room and leave the edges dead
If a room is full of mismatched, ugly-colored bulbs, I will often switch them off entirely and lean harder on clean daylight or my own LED panels. One consistent light source beats three that are fighting each other.
A simple room-by-room lighting workflow
Interior walkthroughs
Walkthrough footage lives and dies on consistency. You want the viewer’s eye to flow through the property without hitting jarring shifts in brightness or color.
– Declutter the space — remove anything that catches light the wrong way or distracts from the architecture.
– Activate only the practical lights that genuinely improve the image.
– Scan every window for hotspots, blowouts, or harsh shadows that break the illusion of a calm, balanced room.
– Find the camera angle that gives the best compromise between interior exposure and exterior detail.
– Record a short test and review playback — not just on the monitor, but on the device your client will likely watch from, which is often a phone.
A room that photographs beautifully from one direction can fall apart when you turn 180 degrees. Always test both before you commit to the take.
Living rooms and open-plan spaces
Large, connected spaces crave layered light because a single source rarely reaches every corner with the same quality.
– Let daylight anchor the scene as the dominant source.
– Place a lamp or two in darker zones — behind a sofa, in a reading nook — to create depth and prevent those areas from receding into shadow.
– Make sure ceiling lights, if they are on, stay consistent in color and intensity across the entire open area — one yellow pool overhead in an otherwise daylight-balanced room pulls the eye for the wrong reason.
– Guard the brightest window wall; if it clips to pure white, pull exposure down slightly or angle away until you recover just enough detail to keep the room feeling grounded.
Step back and ask: does the image still read as balanced when I squint at it on a five-inch screen? If not, simplify.
Kitchens
Kitchens pack more reflective surfaces into a small footprint than any other room — windows, polished countertops, glass cabinet doors, stainless steel appliances — and every one of them can become a light trap.
– Clean every glossy surface with obsessive attention; even a faint water spot becomes a specular highlight under strong light.
– Angle camera and lights to push harsh reflections out of stainless steel panels and appliance fronts.
– Use practical lights only when they share the same color temperature — no mixing a 2700K warm under-cabinet glow with a 5000K daylight window.
– Watch for heavy, unflattering shadows cast by overhead fixtures onto countertops and islands.
Under-cabinet lights are a wildcard. Some render a warm, inviting glow that lifts the whole bench area; others cast a narrow, jaundiced stripe that looks more like a problem than a feature. Test, don’t assume.
Bedrooms
A bedroom should land as calm, even, and soft — a space that promises rest, not drama.
– Favor gentle, indirect daylight. Sheer curtains can transform harsh sun into a smooth, diffuse wash.
– Keep contrast low across bedding and headboards; strong shadows cutting across pillows look restless.
– A single warm lamp on a nightstand can add just enough depth without making the room feel busy.
– Identify and manage hotspots bouncing off mirrors, glossy wardrobe doors, or polished floor surfaces.
Often, a bedroom looks its best with the fewest sources. Resist the temptation to over-light; let shadows exist where they naturally belong, and the space will feel more authentic.
When to use artificial lighting
Daylight alone is not always enough. Dark interior bathrooms, north-facing apartments, basement suites, rainy afternoons, twilight shoots, and deep floorplans with small windows all push you toward artificial sources.
A reliable LED panel for property work should be:
– Soft — hard light reads as staged and unnatural in a home environment
– Adjustable in output and color temperature, ideally bi-color
– Compact enough to squeeze into tight corners or behind furniture
– Color-accurate so it blends with the room’s existing light without introducing a color shift
Bi-color panels earn their place on almost every shoot because you can dial them to match the dominant temperature in the room — whether that is a warm table lamp or cool afternoon daylight — and avoid the telltale signs of mixed lighting.
Light types: what works and what causes problems
| Light type | Best use | Common problem |
|---|---|---|
| Natural daylight | Most interiors and exteriors | Harsh contrast and window blowout |
| Practical lamps | Warmth and depth | Mixed color temperatures |
| LED panels | Filling shadows and dark rooms | Flat, artificial look if too strong or too direct |
| Softboxes | Controlled, diffused fill | Can be bulky and hard to position in tight rooms |
| Overhead ceiling lights | General illumination | Unflattering top-down shadows, color mismatch with daylight |
Exposure and white balance: the hidden part of lighting
Lighting is not just about the fixtures you place; it is equally about how the camera interprets what is already there. Two settings — exposure and white balance — do the heavy lifting.
Exposure
Exposure determines how bright the entire image reads. For real estate video, the practical rule I return to constantly is: expose for the interior — the space the buyer will inhabit — and let the exterior handle itself. Windows can glow pleasantly bright without needing to be perfectly resolved. A muddy, underexposed living room, on the other hand, is an immediate turn-off.
The exception applies when a view carries most of the listing’s value. In that case, protect the window detail and bring the interior up with fill light until both hold together.
White balance
White balance controls color temperature, and its mismanagement is the fastest way to make a property feel off. Warm lamps, cool daylight, and green-tinged overhead bulbs do not peacefully coexist — they register as distinct color casts that the camera cannot reconcile.
– Keep your light sources as consistent as possible within a single frame.
– Match the camera’s white balance to the dominant light in the room — do not try to split the difference.
– Turn off any fixture that introduces an unsolvable color cast.
If the playback image looks orange, blue, or green, the culprit is almost always competing light sources, not a faulty camera setting. Fix the room first, then adjust the camera.
A practical lighting setup for one-person shoots
When you are filming alone, every piece of gear has to earn its weight in the bag — and every setup decision has to be fast enough to keep the shoot moving.
Minimum workable kit
– A camera or phone with manual exposure control
– One or two bi-color LED panels
– Light stands that extend high enough to clear furniture but collapse small
– A small piece of diffusion material or a fold-out softbox for each panel
– Spare batteries — LEDs drain faster than you expect on a full shoot day
– A collapsible white reflector for passive fill when you cannot justify adding a powered light
Simple setup method
1. Start with the available daylight — let it set the baseline.
2. Activate only the practical lights that genuinely contribute.
3. Bring in one LED panel from a side or corner angle if a zone of the room is falling too dark.
4. Diffuse that panel if the light looks harder than the daylight you have already established.
5. Review a short clip on the device you are delivering from — a phone screen reveals inconsistencies that a small monitor hides.
The most frequent misstep I see is piling on artificial light too aggressively, too early. A subtle lift reads as professional; an obvious, over-lit room reads as fake. In property video, less light, placed well, usually wins.
Outdoor and twilight lighting
Exterior shots lean heavily on timing and weather because you are working with light sources you cannot reposition.
Daytime exteriors
The facade looks best when:
– Even light wraps around the building without deep, distracting shadows cutting across the front
– The sun remains behind the camera or off to the side, not blasting directly into the lens
– Reflections in windows and glossy paint are managed by adjusting the shooting angle rather than adding gear
If the front of the house is streaked with harsh tree shadows or reflected glare, moving a few feet left or right often solves the problem faster than any tool in your kit.
Twilight exteriors
Twilight is one of the few moments that can make a listing feel truly premium. Interior lights become visible, the sky holds a rich gradient of color, and the whole property reads as warm and intentional.
Twilight shines when:
– The home has strong curb appeal worth showcasing
– Interior practical lights have been staged to look lived-in, not haphazard
– The front elevation and landscaping are attractive after dark
This is the rare scenario where artificial light and practicals together carry most of the visual weight. Walk the property before the light fades and confirm that every fixture visible from the street is doing something pleasing — a dead bulb in a porch light or an empty, dark room behind a picture window will undo the premium effect instantly.
Common real estate video lighting mistakes
Over years of shooting and reviewing footage, the same patterns surface again and again — and they are almost always fixable before the record button is pressed.
– Scheduling a shoot for the worst possible time of day for that specific elevation
– Leaving blinds in inconsistent, half-open positions across adjacent rooms
– Failing to unify color temperature — warm lamp in one frame, cool daylight in the next
– Relying on overhead ceiling lights that flatten dimension and cast downward shadows
– Ignoring reflections in mirrors, glass tabletops, and stainless steel that become unintended light sources or distractions
– Cranking LED panels too high and stripping the room of its natural feel
– Skipping playback on the actual delivery device — what looked acceptable on a monitor often looks harsh or muddy on a phone
Pre-shoot lighting checklist
– Clean every window, mirror, and glossy surface until they disappear
– Decide the purpose of every window covering — open fully, angle, or close — and make it consistent
– Activate only the practical lights that support the scene; switch off the rest
– Remove or replace any bulb or fixture that introduces an ugly color cast
– Test the room from at least two camera angles before committing
– Scan for window glare and hotspots on reflective surfaces
– Match white balance to the dominant light source, not an average
– Roll a short test clip, review it on a phone, and adjust before you start the real takes
Step-by-step lighting plan for a property shoot
Before filming
1. Walk the whole property and note which rooms benefit from the best natural light at the expected shooting time.
2. Prioritize those rooms — shoot them first while the light holds.
3. Identify problem areas: dark corners, harsh window glare, mixed color temperatures from existing bulbs.
4. Stage lamps, position bulbs, and adjust window coverings before the camera comes out of the bag.
During filming
1. Begin with the highest-value room while daylight is at its most cooperative.
2. Film toward the strongest quality light first, then test a reverse angle to see if it holds up.
3. Tweak one lighting variable at a time — a single panel movement, one blind adjustment — so you can trace what changed.
4. Recheck exposure after moving to a new room; what worked in the living room rarely transfers unchanged to the bedroom.
After filming
1. Play back clips and watch for color shifts between rooms — these are more jarring than minor exposure differences.
2. Flag any shot with blown-out windows that distract or muddy shadows that swallow detail.
3. Retake any room that feels visually disconnected from the rest of the property; consistency matters more than one perfect shot.
When “perfect” lighting is not realistic
Some properties simply fight back. Narrow shotgun-style rooms, north-facing apartments that never catch direct sun, basements with tiny high windows, and homes fitted with harsh, mismatched fixtures create real constraints. Chasing studio-level perfection in those conditions wastes time and burns goodwill.
The smarter goal shifts to a believable, clean image that honestly communicates the space. Buyers are not expecting a Hollywood set — they want to understand the layout, feel the volume, and sense whether the home is worth a visit.
A grounded lighting strategy should leave the property feeling:
– Bright enough to explore without squinting
– Natural enough to trust — nothing that screams “we hid something”
– Consistent enough to watch from start to finish without distraction
That is the bar. Reach it, and the video does its job.
FAQ
What is the best lighting for real estate video?
Natural daylight is the most reliable foundation, reinforced by carefully chosen practical lights inside the home and soft LED fill for stubborn dark zones.
Should all lights be turned on for a property video?
Absolutely not. Activate only the fixtures that improve the scene — anything that introduces a color cast, harsh shadow, or visual clutter stays off.
How do you avoid blown-out windows in real estate video?
Adjust the shoot time if possible, change the camera angle to reduce the brightness difference, and make a conscious call about whether the interior or the view matters more in that specific frame.
Can you film real estate video at night?
Yes, but it demands strong, intentional lighting — both inside and outside. Twilight, when interior lights glow and the sky still holds some color, almost always outperforms full darkness.
What color temperature works best?
The temperature that matches the dominant light source in the room. Consistency within a scene is far more important than chasing a universal number across the entire property.
Conclusion
Real estate video lighting is not about complex rigs or cinematic drama — it is about deliberate control. Start with the cleanest daylight you can get, use the home’s own lights with intention, and lock in exposure and color so that every room feels like part of the same property. When the lighting serves the space instead of fighting it, the footage looks clearer, the property feels more valuable, and the listing simply sells better.